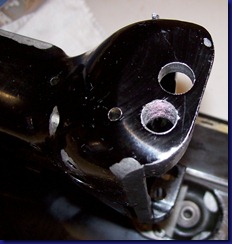
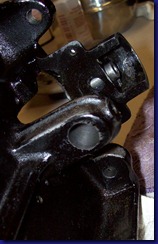
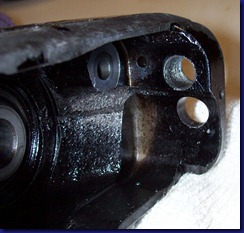
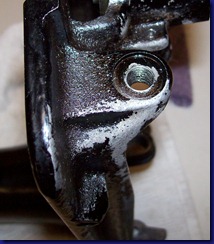
Saturday, December 31, 2011

New Kitchen

Well this is my last post of 2011. Can you believe this year is already over? It just flew by! Thank you tagging along on my journey – you’ve helped make this past year more interesting and enjoyable than I could have imagined.

So, before we go on, I want to wish each and every one of you a very Happy New Year!!!!

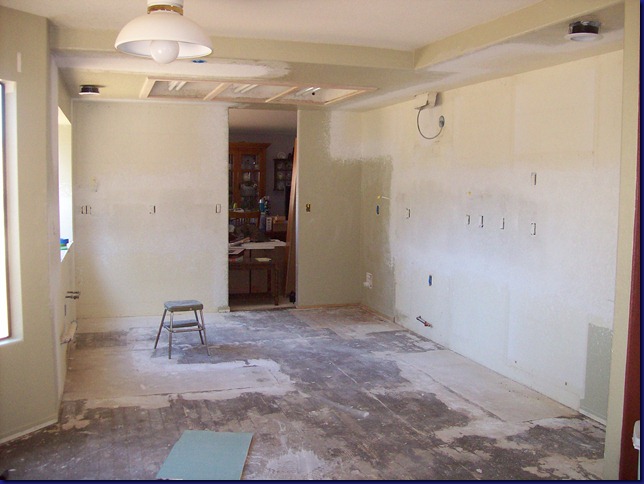
Now for the warning - This is way off topic, but I’m posting pictures of my new kitchen since several of you are interested.


Wednesday, December 28, 2011

Miss Wilson

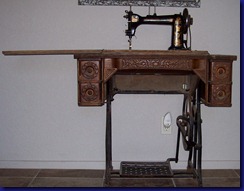
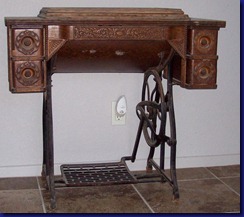
I’d like you to meet the latest addition to my sewing machine family.  I’ve named her Miss Wilson.  She is a Wheeler & Wilson model 9 treadle sewing machine.  She was a birthday/Christmas gift from my mother and father in-law who purchased her at a yard sale near Redmond, Oregon. 
100_1053   100_1061
There were several things that made me fall in love with her at first sight.  One was the very ornate carvings on the cabinet.  You just don’t see wood work like that these days.  There is detail scroll work even on the sides of the cabinet!  This cabinet is a piece of art in my opinion, which is why it is now the first thing you see when you walk through my front door. 

Thursday, December 15, 2011

Miss me?

First of all, let me apologize profusely for being away so very, very long.  Hopefully my absence hasn’t sent all of you running off to much more interesting venues, because I am having huge Ms. Rusty and blogging withdrawals that will be alleviated soon and I’d like to think someone is there to share the joy of continuing the process with me!

For those of you who are wondering where in the heck I’ve been, well here is the short version:

Computer Problems:  I’ve had 4 hard drives in 3 different computers crash on me.  It has been no small feat recovering from each failure, but I think we’re finally back in business.

Travel:  Work has sent me all over the word on business trips – including a week in Milan, Italy and a week in Puerto Rico.  I also went to Nebraska to help my Grandma celebrate her 90th birthday.  Grandma is still doing amazing and if I’m even half as spry and witty as her when I reach 90, I’ll be one happy woman!

Kitchen Remodel: There were problems with the remodel, including discovering the week before Thanksgiving that our refrigerator wouldn’t actually fit in the kitchen.  However, we are now FINALY done with the remodel and I am very happy with the results.  I can post pictures if anyone is interested, but it isn’t exactly sewing machine related.

Thanksgiving:  Dinner was at our house in the new kitchen and my mom was kind enough to come out for a long visit to help out. 

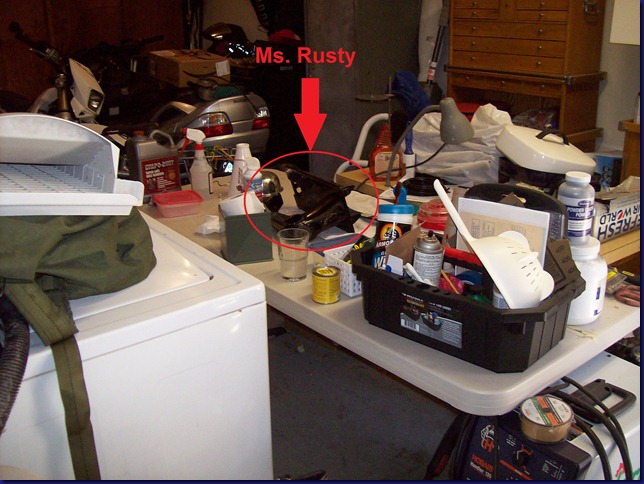
New Airplane:  My husband decided to sell his airplane in order to buy a new airplane kit. So, just when I thought I’d be able to get access to Ms. Rusty to start wrenching on her again, the garage is taken over by a huge 4’ x 4’ x 12’ box and a few other equally large boxes full of airplane stuff!  This weekend I’m helping my husband unpack the boxes and do inventory on them so I can finally access my workbench again!!

So, needless to say, the last two months have been very busy and none of it related to Ms. Rusty.  I could have bored you all to death with the gruesome details along the way, but I’m trying real hard to keep this blog focused on sewing machines. 

The good news is that I have absolutely no travel plans for Christmas and should be able to get time to work on Ms. Rusty.  The next post (hopefully in the next week or so) will be focused on masking off Ms. Rusty in preparation for bead blasting.  Don’t give up on me now (ha! ha!)

Thursday, September 29, 2011

I’m Back!

I made it back from vacation safe and sound.  One of my first stops was my workbench to check on Ms. Rusty.  Thankfully she didn’t punish me for my absence as she is still rust free and waiting for her “facial” (aka – bead blasting).  Apparently that last dip in Evapo-rust did the trick!

Unfortunately, my kitchen remodel began the day after my return and forced me to put Ms. Rusty on the back burner once again.  This time, I can’t even get to my work bench because she is surrounded by appliances and other miscellaneous items moved into the garage to allow for the remodel.  We only had 1 day to empty the kitchen, living room and laundry room – otherwise I would have tried to find a way to make sure I had access to my girl.

Remodel neglect

On sewing machine related topic, my wonderful MIL and FIL gave me my birthday present while we were visiting them on our vacation.  They gave me a 1897 Wheeler & Wilson No. 9 treadle machine in a beautifully carved cabinet! (Thank you once again Mom and Pops!!!)  I hope to take some pictures of my new baby this weekend and share them with you. She is a beauty!

That’s all for now.  I’m off to paint the kitchen in preparation for the cabinet installation that begins tomorrow.  I’m so glad that the painting is the only thing we chose to do on our own for this remodel.  Otherwise it may be months, rather than weeks, before Ms. Rusty gets any attention! 

P.S.  For those that are curious – here is the current state of my kitchen.  I can’t wait until I have a sink and stove again so I can make home-cooked food rather than going out for every meal. Sad smile

100_0905

Wednesday, September 21, 2011

Vacation Update

Today is the first day since beginning my vacation that I've had both the time and capability to access my blogger account.  I wanted to give you a quick update to let you know that my husband and I were not one of the many people injured in the Reno Air Race tragedy last Friday.  Although the plane crashed right in front of our reserved seats, we were safely in our camper at the time of the mishap - God was truly protecting us on Friday. 

Unfortunately, two of my father-in-law's good friends and neighbors passed away in this accident, and I wouldn't be surprised if there are others of you reading this blog that are affected by this terrible event. 

My thoughts and prayers go out to all of the families and friends who lost loved ones this past weekend.

Monday, September 12, 2011

Vacation Time

I’m sorry to say that I did not have time to work on Ms. Rusty at all this past week.  That pesky place that gives me a paycheck  (a.k.a. work) kept me too busy with projects that need to be finished before I go on vacation – 24 hours and counting!

Speaking of vacation, I will be enjoying the lovely sounds of airplanes making left turns in the sky as my hubby and I (along with our two pups) go to the Reno Air Races later this week.  After lots of aircraft related fun we then go to Oregon for a week to go camping and visit with family.  With all that excitement and travel, Ms. Rusty will be ignored again. 

SO, unless there is some sewing machine related news that I can’t wait to share, I won’t be checking in until late September. 

Enjoy the last few weeks of summer – I know I will Winking smileParty smileOpen-mouthed smile

Sunday, September 4, 2011

Another bath

Well, the heat of summer has taken its toll on me and Ms. Rusty.  It’s been too hot to work in the garage the past several weeks, not to mention I’ve had a huge project due at work that kept me from doing much tinkering.  As a result, Ms. Rusty hasn’t been getting much love lately and has punished me by rusting again. 
To be fair, she didn’t have much choice in resorting to rust given that I hosed her down with water after her last Evapo-Rust treatment.  My mistake was that I didn’t give her another quick dip in the stuff to coat her surfaces to prevent rust from reoccurring.  Here are some photos that show the result of my neglect.
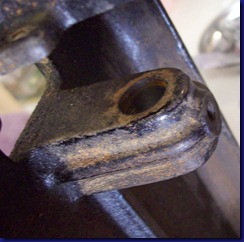
Pre-bath rust 1     Pre-bath rust 2Pre-bath rust 3    Pre-bath rust 4
Initially I wasn’t too worried because I thought I would just sandblast all the rust off.  Then after a few days of denial I came to my senses and realized that there are some parts that will NOT get sandblasted, such as thread fittings (as in screw threads, not fabric threads).  That’s when I decided Ms. Rusty needed another bath.
This time I opted not to do mop bucket method, like last time.  While that worked ok, it required more Evapo-rust than was really necessary to get all of Ms. Rusty submerged.  Instead, I did the “bag-in-a-bucket” method (I made that name up just in case you are wondering).

Update:  I can't take credit for inventing the "bag-in-a-bucket" approach.  I saw the concept first mentioned on one of the Yahoo! Groups I belong to.  Coincidentally, Dragon Poodle outlined a very similar approach on her blog the same week as this post (http://dragonpoodle.blogspot.com/).  I wish I had seen her post prior to giving Ms. Rusty her second bath so I could have used some of her tips, like using bubble wrap instead of towels and a sweatshirt :)

I started off with one bag in a short bucket, like so:  Bath option 1
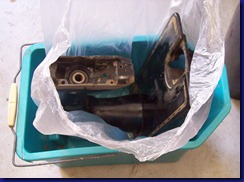
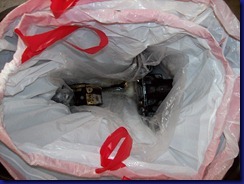
While it might have been ok, I was concerned with the height of the bucket not being sufficient to hold the Evapo-Rust (ER) if it happened to leak out.  That then made me think that maybe 1 bag wasn’t enough.  So I went to plan B – triple bag in a tall kitchen trash can.
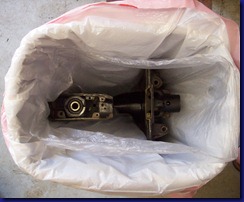
Bath option 2   Bath step 1
I then poured a gallon of ER on top of Ms. Rusty, but this only covered her rear arm. Bath step 2
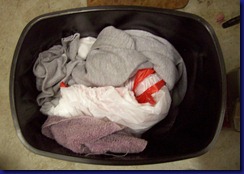
So, to displace some of the air and make the fluid rise up higher, I tied up the bags and stuffed towels and an old sweatshirt (just happened to be on my workbench at the time) around Ms. Rusty outside the bags .  It worked pretty well as the ER ended up covering over half of Ms. Rusty.
Mummified Ms. Rusty - Bath step 3
After a 90 minute soak, I took out the towels and other stuffing and unwrapped the bags.  Surprisingly there were no leaks!  I then turned Ms. Rusty over on end to make sure her other side got the ER treatment.  Again, I tied up the bags and stuffed towels and such around her to make the fluid rise to the level I wanted.  After another 90 minute soak she was done.
This time when I took out the towels they were more than damp so a leak had sprung somewhere during the second soaking step.  However, most of the ER liquid was still in the bag.  After wringing out the towels in the bucket and returning that, along with the “bag” liquid to the ER container, I ended up with a nearly full container!
Ms. Rusty was placed on my workbench and was NOT rinsed off.  I did wipe her down with a towel, but I left the residual ER to help prevent the return of any surface rust.  She definitely looks better after her second soak and is ready to be prepped for sandblasting.
Post-bath 4    Post-bath 1Post-bath 2      Post-bath 3
Hopefully it will cool down a bit this weekend so I can spend more quality time with my old girl.  There is a lot of prep that needs to be done to plug up threaded holes and machined edges that should not be exposed to sandblasting.  My goal is to get that part done before I go on vacation in 10 days.  We’ll see……
Thursday, August 25, 2011

Ketchup Anyone?

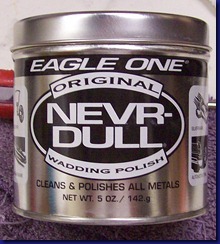
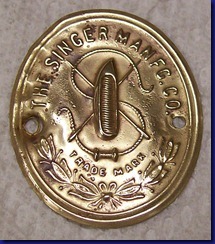
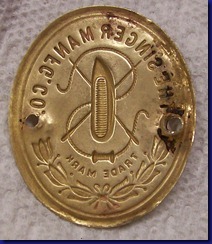
This post is all about cleaning up the nasty looking badge I removed from Ms. Rusty.  Initially I cleaned it up using the usual kerosene but it didn’t do much to improve the appearance.  I then  purchased some metal polish, specifically Eagle One Nevr-Dull because it is supposed to work well on all metals.  One a side note – I wonder why all these automotive type agents have hyphens in their brand names? (Evapo-Rust, Break-Away, Nevr-Dull, WD-40, etc.)  Is it a requirement that I don’t know about?

Never dull

Using the Nevr-dull improved things a little bit, but the badge still didn’t look very good and this new product was taking more elbow grease than I’d like.  So I searched online for ways to clean tarnished brass.  Several different recipes of salt/vinegar combinations came up in my Google search, but my favorite “remedy” was to use ketchup!

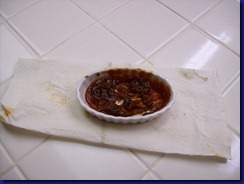
So, I took the badge and soaked it in a dish of ketchup overnight.

 badge in ketchup mmm – tasty Laughing out loud

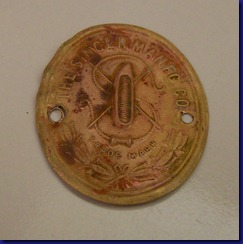
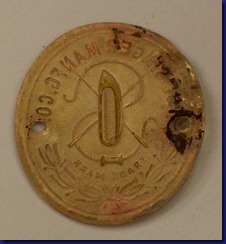
After rinsing the badge it actually looks pretty good!

Front  close-up post ketchupBack  back after ketchup

It was after the ketchup treatment that the Nevr-Dull really showed it’s stuff.  I spent about 10-15 minutes polishing the badge and it looks much better.

Front  Front - clean Back  Back - clean

Now the badge isn’t perfect, so it will need a bit of tinkering to get it bent back into the correct shape around the edges.  I also need to spend some extra time to get the tarnish out of the crevices on the back.  Hopefully I can figure out how to do that, and get it done, by the time Ms. Rusty is ready for her “new” badge.

Tuesday, August 23, 2011

Thank you, Rain!!

No, I’m not talking about the liquid stuff that falls from the sky periodically.  I’m referring to Nicholas Rain Noe at The Vintage Singer Sewing Machine Blog.  He made me feel like a superstar (which I am not, just in case you were wondering – Ha! Ha!) Not only does he follow my blog, but he also interviewed me and then apparently found it interesting enough for him to post the interview on his amazing blog today! 

Part of my shock stems from the fact that, unlike me, Rain actually knows what he is doing when he fixes up vintage Singer sewing machines.  I can’t even begin to tell you how much I’ve learned from him between his blog and his contributions to the Yahoo! groups on sewing machines.  In some ways it’s like Kobe Bryant interviewing an basketball fan!

So, I recommend you do one of the following:

  1. If you want to learn how to work on a vintage Singer from someone with experience and knowledge, then you need to check out and follow his blog.  He also has a great tutorial on how to identify the model of a vintage Singer from less than ideal (i.e. crappy) Craigslist photos.
  2. If you want to find more about me, a complete amateur with no experience and likely has a screw loose, then you should check out what he posted today on his blog http://vssmb.blogspot.com/2011/08/restoring-201-2-interview-with-elle.html.
  3. If you don’t care about vintage sewing machines – What’s wrong with you!  Check out Rain’s blog so you can get hooked!

Sunday, August 21, 2011

Naked Ms. Rusty

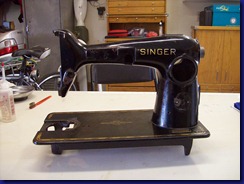
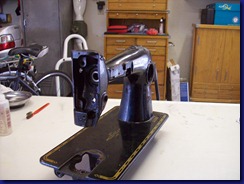
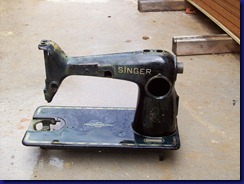
Well, I guess “naked” depends on your definition.  Is paint skin or clothing?  In any case, here are photos of my girl with just her paint and decals:

Naked Front  Naked LeftNaked Right  Naked BottomFront Rust close-upNaked Back 

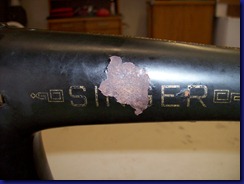
Here is a close-up of some of the rust lurking under her paint:Rust - close-up  Yuck!!Sick smile

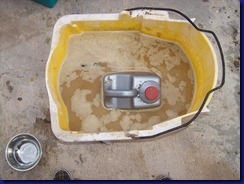
To get rid of that nastiness, Ms. Rusty will be getting her own personal spa in Evapo-Rust.  The first problem is finding a container large enough to soak her in.  I had an old industrial sized mop bucket that fit the bill and Ms. Rust could lay on her side in the bottom of it. 

The second problem was finding enough Evapo-Rust to cover her.  I used 2 gallons, but it still wasn’t enough, so I filled one of the empty gallon bottles with water and put that in the the “bath” as displacement.  That worked well, but she still wasn’t quite covered, so I added some sand for further displacement.  Finally she was covered and could enjoy her bath.

Ms. Rusty Soaking:Ms. Rusty Soaking - 2

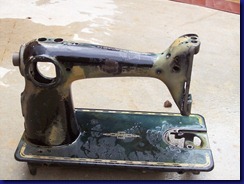
I let her soak over night, or about 30 hours, and then took her out and hosed her down to rinse off all the Evapo-rust.  Here are some photos after her bath. 

Back - after bath  Front - after bath Top - after bath

You’ll notice that the clear-coat finish has quite a bit of hazing/damage after her bath.  I suspect that is because Evapo-Rust is water based and got underneath the clear-coat in the rusty areas.  I don’t much care in this case since I’m blasting it all off anyway.

The next time you see Ms. Rusty will be after her “facial” (aka – sand blasting).

Saturday, August 20, 2011

Other parts

This post covers all the other miscellaneous parts that I removed from Ms. Rusty prior to her Evapo-Rust treatment.

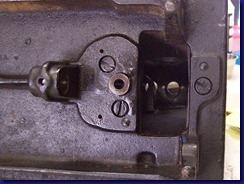
One of the parts I tried taking out was the arm shaft busing.  To do this it  is necessary to loosen or remove the set screw holding it in place.  The photo below shows the location of this screw.

screw in stop motion flanged bushing

Once this set screw is out you have to use a brass rod or wooden dowel to tap on the back of the bushing.  The Adjusters Manual states it’s important that you don’t want to concentrate all the force on just one area of the bushing.  After quite a while of trying to tap this busing out, and using copious amounts of Bread-Away, the bushing just wouldn’t come out.  So, rather than press my luck I decided to leave this bearing in place.

The next part on my list was the upper bushing for upright gear shaft (see photo below).

upper arm bushing

Like any of the other bushings on Ms. Rusty, it is held in place with a set screw.  This one can be viewed, and removed through the hole under the balance wheel.

bushing set screw

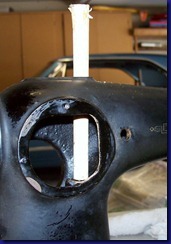
Then it’s a simple matter of using a dowel through the top of the machine to tap the bushing out.

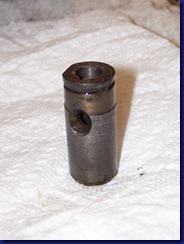
Mid removal:  pushing out upper arm bushing   After removal:   upright gear shaft bushing

The next two photos show the view from under machine after the bushing is removed.

Lower bushingupright gear shaft bushing removed

These photos also show the lower bushing for upright gear shaft, but I didn’t have any luck trying to remove it from Ms. Rusty.  Another thing I tried doing was to separate the Ms. Rusty’s arm from her bed by removing the three large screws under the machine (see photo above).  Unfortunately, these seemed to be welded in place and I also had no luck removing this buggers.

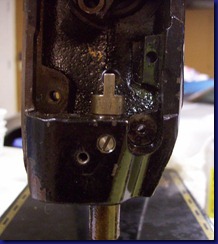
The last piece that I removed from Ms. Rusty was the needle bar post.  The first step was to remove the set screw holding it in place.

screw holding needle bar post

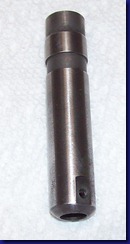
This part required several applications of Break-Away, and tapping it out with a hammer and a wooden dowel, but I was eventually successful in getting it out.  I really wanted this part out since it had a lot of surface rust on it.  Here is a photo of the part after it was cleaned with kerosene and Evapo-rust and had a little sanding with fine grit sand paper to smooth the surface.

Needle Post

Next time – Ms. Rusty goes for a bath!

Thursday, August 18, 2011

Badge Removal

Now I can’t strip and paint Ms. Rusty with her badge still on, so it will have to come off.  Also, the poor badge is not in great shape so it will need some TLC also. 

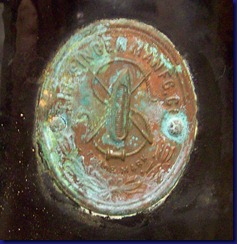
See all that lovely corrosion?  B4

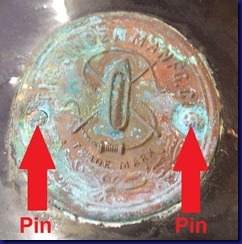
The badge is attached to the arm by two pins  B1 - labeled

Before you can take off the badge, the pins need to be removed.  One way is to drill them out, but a less invasive way is to straighten the pins and pull them out.  I’m wasn’t sure the second option was viable due to the corrosion, but I gave it a try anyway.