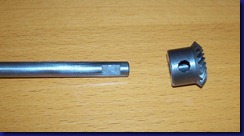
Today’s adventure was pretty straight forward for a change. I decided to install the upright arm shaft, which is the shaft with gears that connects the lower gear shaft with the upper gear shaft. A picture is below and a link to the disassembly of this baby is here.
The upper gear is the smaller one, and that is the one that I took off to insert into the arm of the machine. The photo below shows the “flat” of the shaft where one of the set screws of the gear should rest against when it is reassembled.
If I haven’t mentioned it before, I’m lightly oiling all the parts with regular sewing machine oil before assembly. This helps the parts slide together easier and adds a little protection from rust.
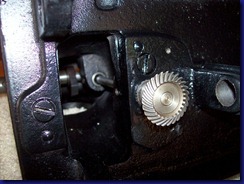
Here are photos of the bottom of Ms. Rusty and they show the “before” and “after” shots. It’s easier to show pictures than try to describe where to insert the shaft.
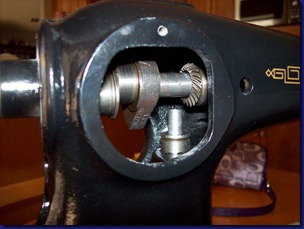
Now here is a photo of the top end of the shaft, as seen through the arm side cover opening.
What this photo is intended to show is that it is not possible to attach the top gear to the shaft without first moving the gear on the horizontal arm shaft out of the way. That is why I didn’t worry too much about exact placement when this gear was initially installed. After the horizontal gear is pushed back a bit, then the upright gear can be put on. This can be a bit awkward for one person to do since you have to push up on the shaft while aligning the gear over the hole, and then tightening the screw. To solve this problem, I propped up the shaft at the bottom with a small box of toothpicks and then it went pretty smoothly. An alternative would be to have a helper or a third hand, but I had neither at the time ![]() You can tell the gear is in proper position on the shaft when, using the words of the Singer Adjuster Manual, the end of the the shaft is approximately flush with the face of the gear.
You can tell the gear is in proper position on the shaft when, using the words of the Singer Adjuster Manual, the end of the the shaft is approximately flush with the face of the gear.
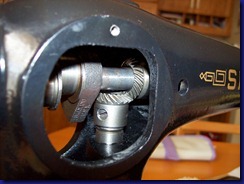
The next step is to bring the gear of the horizontal arm shaft and put it in mesh with the gear of the upper arm shaft. It helps to have a pair of bent nose pliers for this step to pull and hold the horizontal gear into place to tighten the set screws. The photo below shows the completed assembly.
Then I rotated the shafts at the balance wheel hub to make sure everything was turning smoothly and nothing was binding. The adjusters manual warns that the gears should not be pressed too tightly against the bushings as this could “retard the free rotation of the upright arm shaft”.
When I was sure everything was working the way it should be (at least as far as I could tell), I applied grease to the gears and did a few more rotations to work the grease into the gears. I want to make sure those babies are ready for the big show when the time comes!
Next time I’ll tackle the connecting rods. Oooooo – what fun!


